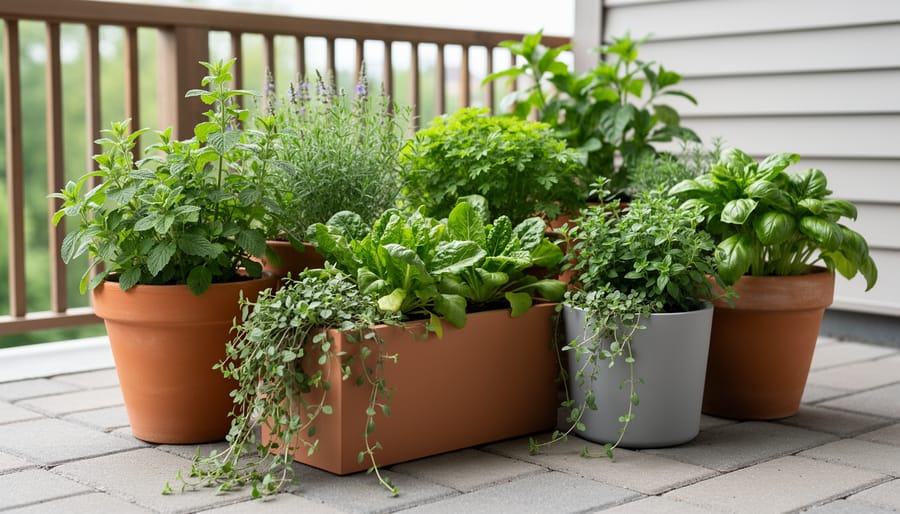
Container gardening transforms any outdoor space into a productive growing area using portable vessels instead of traditional in-ground beds. This approach suits balconies, patios, rental properties, and yards with poor soil, offering complete control over growing conditions while creating visual focal points that blend horticultural function with landscape design. Success depends on matching container materials, drainage systems, and volume to specific plant requirements, then positioning these elements to optimize sun exposure and accessibility.
The versatility of container cultivation extends beyond practicality. Strategic groupings create microclimates that support companion planting, while mobility allows seasonal repositioning to follow optimal light patterns or protect tender specimens from early frost. Container gardens also provide an accessible entry point to involve your child in hands-on planting without committing permanent garden beds. The ten concepts outlined here demonstrate how deliberate vessel selection paired with appropriate plantings delivers both aesthetic cohesion and horticultural performance across diverse property types and growing objectives.
How We Selected These Container Ideas
Our selection process evaluated containers through four core lenses that matter most for Canadian success. First, we assessed functional performance, containers must provide adequate root depth, proper drainage, and material durability through freeze-thaw cycles common across Canadian zones. Second, we examined aesthetic versatility, ensuring each option complements diverse architectural styles from urban condos to suburban estates. Third, we considered maintenance realism for busy property managers and homeowners, balancing visual impact with time investment. Finally, we prioritized creative adaptability, containers that work across multiple plant types and seasonal transitions.
This methodology draws from JRALA’s two decades installing and maintaining container gardens throughout Canadian properties. We combine artistic integration, understanding how containers function as landscape elements, with scientific precision regarding soil volume, moisture retention, and thermal protection. Every featured option has proven successful in real-world applications, not just design portfolios.
1. Vertical Tiered Planters for Herbs and Edibles
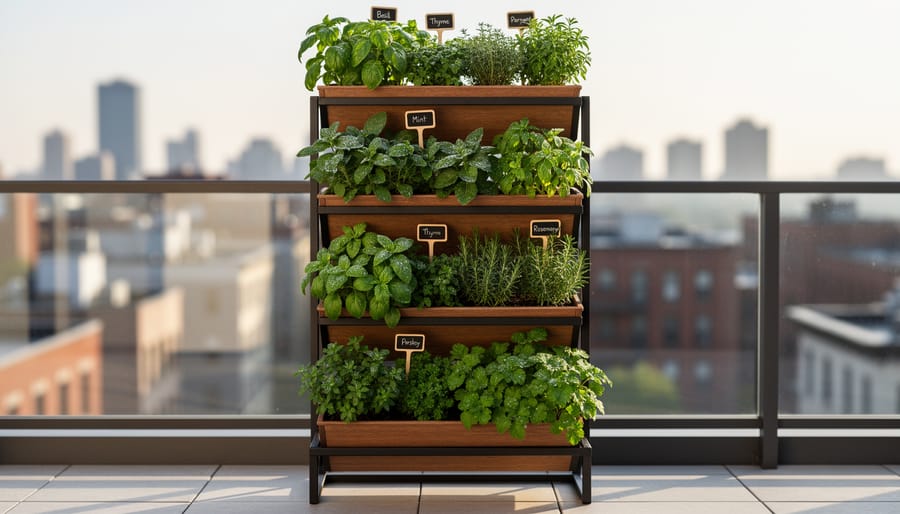
Vertical tiered planters stack growing zones upward, transforming a two-square-foot footprint into six or more planting pockets, essential when ground space is scarce. These multi-level systems work exceptionally well for culinary herbs and compact edibles like lettuce, spinach, and dwarf peppers, giving you fresh ingredients within arm’s reach of your kitchen door.
Material choice affects both durability and aesthetics. Cedar and redwood tiers resist rot naturally and age into silvery patinas, while powder-coated metal frames offer sleek, modern lines that won’t warp. Resin units are lightweight and easy to move, though they may fade under intense sun exposure. Regardless of material, confirm each tier has drainage holes and position the tallest plants at the top tier so they don’t shade lower levels.
Arrange plants by water and light requirements. Place thirsty basil and parsley in upper tiers where soil dries fastest, and position moisture-loving mint or chives lower down where runoff collects. Sun-lovers like rosemary and oregano belong on the bright side, while cilantro and lettuce appreciate afternoon shade. This zoning approach reduces watering effort and keeps each plant in its ideal microclimate.
For balconies and small patios, vertical planters deliver maximum harvest from minimal square footage while creating a living privacy screen that’s as productive as it is beautiful.
2. Repurposed Wooden Crates and Boxes
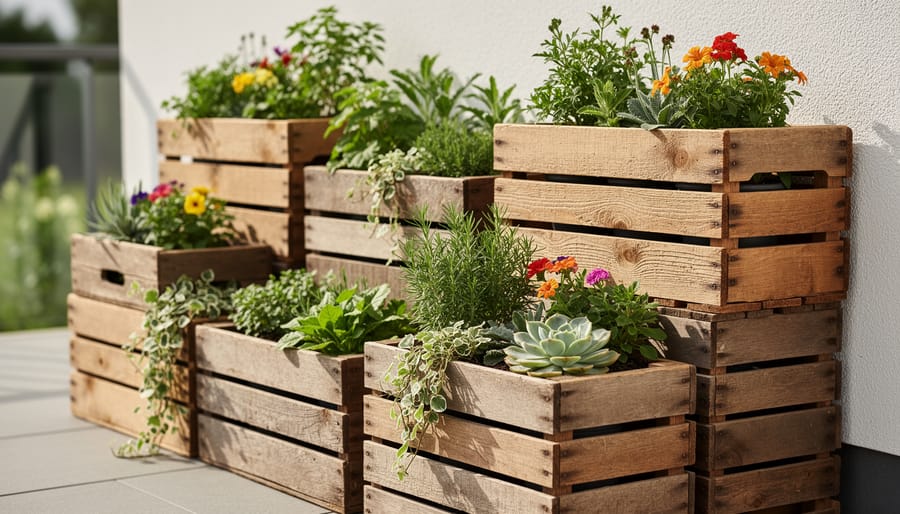
Reclaimed wooden crates bring warmth and character to container gardens while supporting sustainability through material reuse. Wine crates, apple boxes, and vintage shipping containers make excellent planters once you address their structural needs.
Start by drilling three to four half-inch drainage holes in the bottom of each crate. Without proper drainage, wooden containers trap moisture and accelerate rot. Line the interior with landscape fabric or burlap to prevent soil from washing through gaps while allowing water to escape. This lining extends the crate’s lifespan by reducing direct soil contact with wood.
Select shallow-rooted plants that thrive in the limited depth most crates provide. Lettuce, herbs like oregano and thyme, annual flowers such as marigolds and alyssum, and compact succulents all perform well in eight to ten inches of soil. For deeper crates, consider bush tomatoes or dwarf pepper varieties.
The rustic aesthetic of weathered wood works beautifully when you group multiple crates of varying sizes. Stack smaller crates atop sturdy larger ones, or arrange them in staggered heights across a patio. This layered approach creates visual interest while maximizing growing space in compact areas. Treat untreated wood with natural linseed oil to slow weathering, or embrace the silvered patina that develops as the wood ages naturally.
3. Self-Watering Container Systems
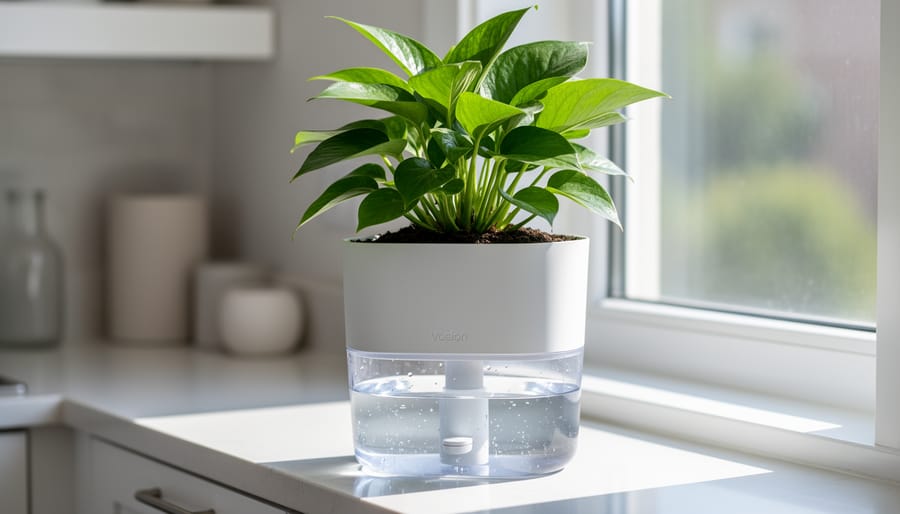
Self-watering containers operate through capillary action, water stored in a bottom reservoir wicks upward through the soil as plants absorb moisture, maintaining consistent hydration without daily watering. This technology matters especially for property managers overseeing multiple sites or homeowners juggling demanding schedules, reducing watering frequency from daily to every 3-7 days depending on weather and plant selection.
The reservoir typically sits beneath a perforated platform supporting the soil column. A fabric wick or soil column extending into the water draws moisture upward as the root zone dries. Most systems include a fill tube for easy topping and an overflow hole preventing waterlogging during heavy rain. Check reservoir levels weekly in summer heat, less frequently during cooler periods or rainy stretches.
Plants with moderate, consistent water needs thrive in these systems, tomatoes, peppers, herbs like basil and parsley, lettuce, and compact annuals such as calibrachoa and impatiens. Avoid drought-tolerant Mediterranean plants (lavender, rosemary, sage) that prefer soil to dry between waterings; constant moisture creates root rot risk. Similarly, water-sensitive plants like succulents perform poorly.
Reservoir maintenance requires seasonal attention. Empty and clean reservoirs before winter to prevent freeze damage and algae buildup. Replace wicking fabric every 2-3 years as it degrades. The science is straightforward, but matching plant biology to the moisture delivery method separates thriving containers from struggling experiments.
4. Hanging Basket Cascades
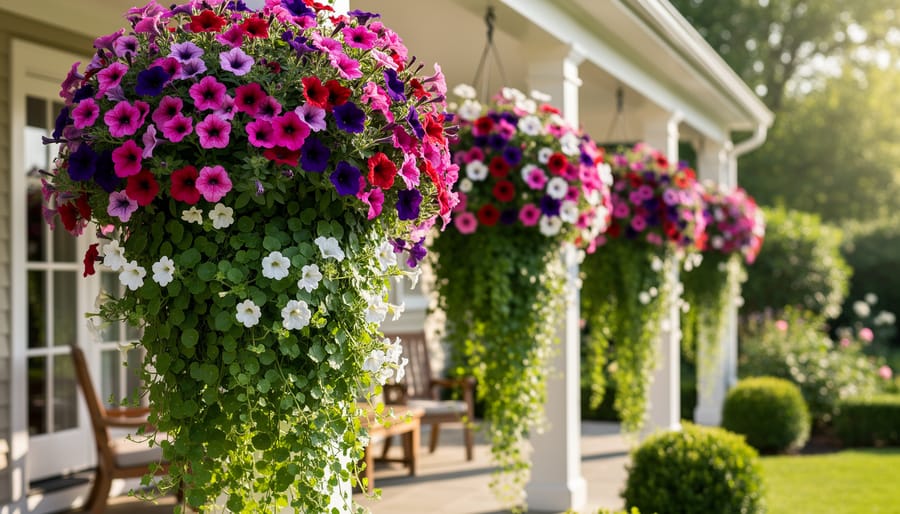
Hanging baskets transform vertical space into cascading displays of color and texture, perfect for properties where ground-level planting area is limited. These suspended containers work beautifully on covered porches, pergolas, and entrance overhangs, creating eye-level garden interest that welcomes visitors while leaving walkways and seating areas clear.
The key to successful hanging baskets starts with proper hardware selection. Choose heavy-duty brackets rated for at least 15-20 pounds when wet, soil, plants, and water add significant weight. Ceiling hooks must anchor into solid wood joists or blocking, never just drywall or soffit material. For pergola installations, verify beam capacity before hanging multiple baskets.
Soil mix determines whether your hanging garden thrives or struggles. Use a lightweight, soilless mix containing peat moss or coco coir with generous perlite for drainage. Standard potting soil becomes too heavy and compacts in suspended containers, restricting airflow to roots. The lighter mix also reduces strain on mounting hardware.
Plant selection drives visual impact. Trailing petunias, calibrachoa, and bacopa create classic cascades, while sweet potato vine adds bold foliage contrast. Ivy geraniums tolerate morning sun, and lobelia fills shaded locations. Combine upright centerpiece plants with mid-level fillers and trailing spillers for dimensional displays. Coordinate basket colors and placements with nearby solar landscape lighting to extend viewing pleasure into evening hours, creating an integrated outdoor atmosphere that showcases your containers after dark.
5. Large Statement Urns and Decorative Pots
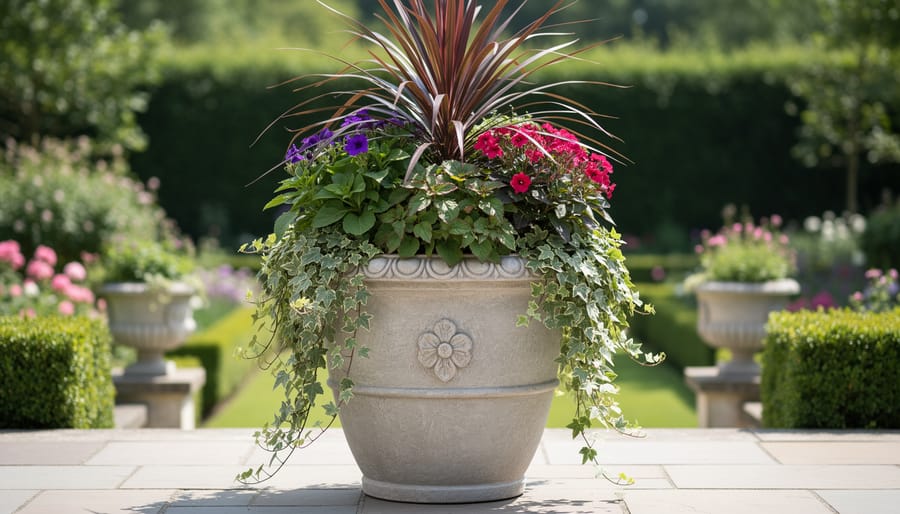
Large statement urns transform container gardening from functional cultivation into genuine landscape architecture. Premium materials, glazed ceramic, stone composite, and fiberglass, offer both visual impact and structural durability that withstands the demands of Canadian outdoor environments. These containers become focal points in entryways, patio corners, or garden transitions, commanding attention while providing ample root space for ambitious plantings.
The thriller-filler-spiller design principle maximizes visual drama in these substantial containers. The thriller serves as the vertical centerpiece, consider ornamental grasses, cordyline, or upright canna lilies. Fillers occupy the mid-zone with mounding plants like coleus, geraniums, or calibrachoa that create body and color. Spillers cascade over the rim: trailing ivy, sweet potato vine, or bacopa soften the container’s edge and create movement.
Proportion matters critically with statement urns. A 24-inch diameter container needs plants reaching 30 to 36 inches at maturity to maintain proper scale, undersized plantings look tentative and fail to justify the container’s presence. Conversely, oversized plants in modest urns appear cramped and unstable.
For year-round appeal, choose containers large enough to accommodate dwarf evergreen shrubs like boxwood or juniper as permanent residents, then layer seasonal annuals around them for rotating color. This approach reduces replanting effort while maintaining the container’s role as a landscape anchor through all seasons.
6. Window Box Gardens
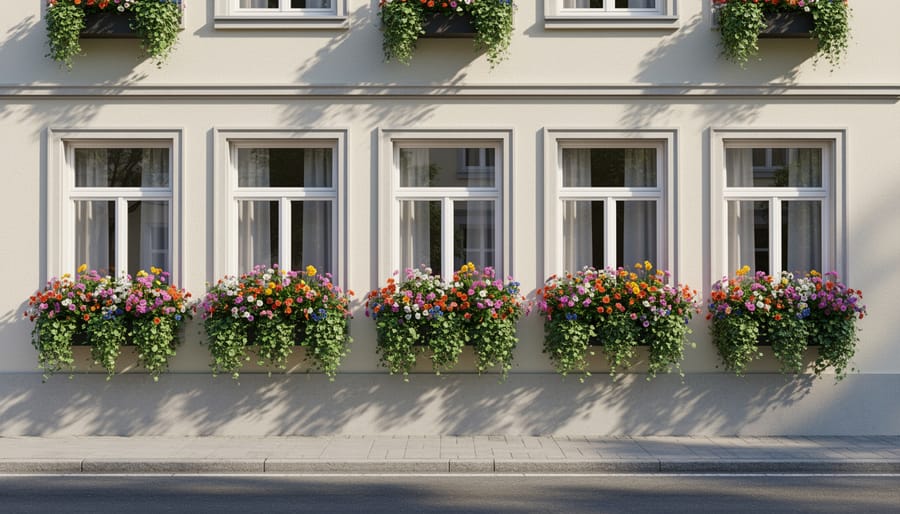
Window boxes transform ordinary facades into vibrant showcases, delivering maximum impact in minimal space. These long, shallow containers attach directly beneath windows or along railings, creating instant curb appeal visible from the street, a powerful asset for property managers seeking to elevate first impressions.
Secure mounting is non-negotiable. Window boxes filled with soil, plants, and water can weigh 40-60 pounds. Use heavy-duty brackets rated for at least twice the anticipated weight, anchored into wall studs or masonry with appropriate hardware. For vinyl siding, mount brackets to the trim board or fascia rather than the siding itself. Check stability after initial installation and again mid-season as moisture cycles can loosen connections.
The microclimate near building walls presents both advantages and challenges. South-facing boxes receive intense reflected heat from siding, requiring drought-tolerant species and vigilant watering. North-facing installations stay cooler and moister, suiting shade plants like begonias and impatiens. Leave a 1-2 inch gap between box and wall to allow air circulation and prevent moisture damage to the building.
Seasonal rotation keeps displays fresh throughout the year. Spring welcomes pansies and trailing ivy, summer transitions to heat-lovers like geraniums and calibrachoa, while fall showcases ornamental kale and chrysanthemums. Consider incorporating unique plants like dichondra ‘Silver Falls’ or purple fountain grass for unexpected visual interest that distinguishes your property from standard plantings.
7. Galvanized Metal Troughs and Stock Tanks
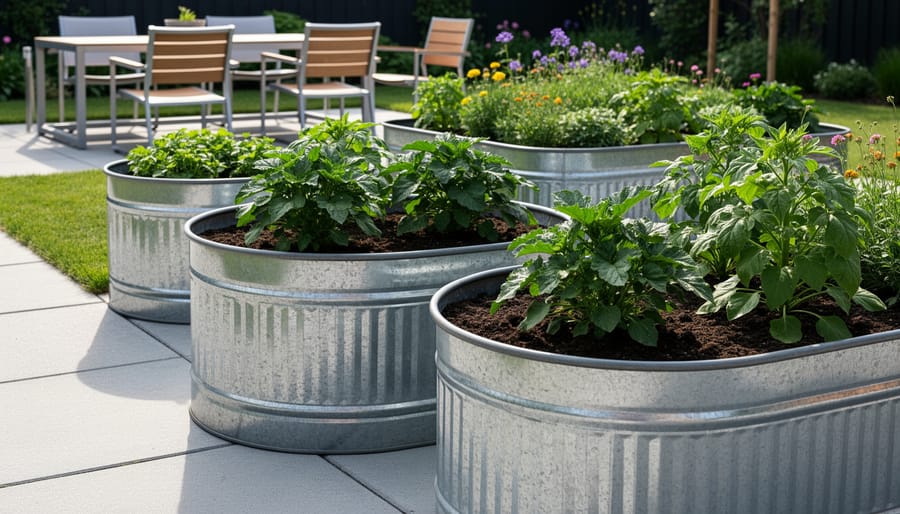
Galvanized metal troughs and stock tanks bring an industrial-modern aesthetic while solving a practical challenge: depth. These containers, originally designed for livestock watering, typically range from 60 to 90 centimeters deep, making them ideal for root vegetables like carrots, parsnips, and potatoes that need substantial soil volume. The farmhouse-chic look translates surprisingly well to urban patios and contemporary landscapes.
Drainage modification is non-negotiable. Stock tanks arrive watertight, so you’ll need to drill multiple holes in the bottom using a metal bit, space them roughly 15 centimeters apart across the entire base. Add a layer of landscape fabric to prevent soil loss while maintaining water flow.
Heat conductivity requires attention in full sun. Metal absorbs and radiates significant heat, which can stress roots along the container walls during summer. Position tanks where they receive morning sun but afternoon shade, or nestle them into gravel beds that provide thermal buffering. Light-colored galvanized finishes reflect more heat than darker metals.
The aesthetic works best when you embrace the utilitarian character rather than fight it. Pair galvanized tanks with complementary materials, weathered wood, concrete pavers, or matte-black hardware. Plant bold foliage like ornamental grasses, kale varieties, or compact tomatoes that match the container’s substantial scale. The contrast between sleek metal and organic plantings creates the modern farmhouse tension that defines this look.
8. Mixed-Material Container Groupings
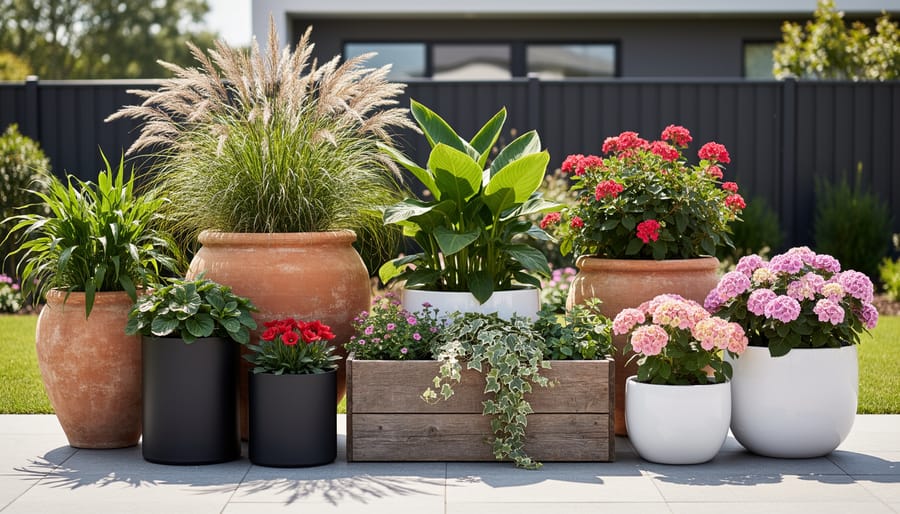
Mixing container materials creates depth and visual interest that single-material displays can’t match. The key is intentional variety, not randomness. Professional designers pair smooth glazed ceramics with rustic terracotta, sleek metal with textured concrete, creating contrast that feels curated rather than cluttered.
Start with the rule of three: select three complementary materials and repeat them in different sizes throughout your grouping. A large concrete planter anchors the display, flanked by mid-sized terracotta pots and small ceramic accents. This repetition creates rhythm while the size variation adds dynamic movement.
Balance matters as much as variety. Distribute visual weight across your vignette by placing heavier, darker containers (concrete, bronze-finish metal) at the base and lighter finishes (cream ceramic, pale terracotta) at eye level. Odd-numbered groupings, three, five, seven containers, naturally feel more balanced than even numbers.
Scale your plant choices to container proportions. Oversized hostas overwhelm delicate ceramic pots, while tiny succulents get lost in large galvanized troughs. Match plant mass to container volume, ensuring each element contributes without competing.
Color palette discipline ties mixed materials together. Limit yourself to three container colors plus natural terracotta. Too many finishes fragment the display. Think charcoal concrete, white ceramic, natural clay, a cohesive foundation that lets your plantings shine.
9. Raised Planter Boxes on Decks
Raised planter boxes transform deck spaces into productive growing areas while maintaining the clean lines of modern outdoor living. These elevated containers offer substantial soil volume, typically 12 to 24 inches deep, allowing roots to spread naturally for vegetables, perennial herbs, and even dwarf shrubs that wouldn’t thrive in standard pots.
Weight becomes a critical calculation before installation. A 4-foot by 2-foot planter filled with moist soil and plants can exceed 400 pounds. Consult your deck’s load-bearing specifications or a structural engineer if you’re working with older decking or planning multiple large boxes. Distribute weight strategically by positioning planters over support beams rather than between joists.
Waterproofing protects your deck investment. Line wooden planter interiors with pond liner or heavy-duty plastic sheeting, ensuring drainage holes punch through both liner and box bottom. Elevate boxes on rot-resistant feet or composite shims to promote airflow beneath, preventing moisture damage and wood rot on the deck surface below.
Soil depth determines what you can grow successfully. Twelve inches accommodates most lettuces, herbs, and shallow-rooted annuals. Tomatoes, peppers, and root vegetables need 18 inches minimum. Twenty-four-inch depth supports small fruit bushes and allows perennials to overwinter with proper insulation.
10. Seasonal Color Rotation Containers
Seasonal rotation containers transform static displays into dynamic features that reflect Canada’s distinct growing phases. Choose lightweight, accessible containers, typically 14 to 18 inches in diameter, that you can easily lift and maneuver when swapping plantings. Plastic resin or fiberglass options work better than heavy ceramic for frequent changes, and built-in drainage ensures consistent performance across all seasons.
Start spring rotations with cold-hardy bulbs like tulips and daffodils, then transition to heat-loving annuals once overnight temperatures stabilize above 10°C. When making the switch, remove spent plants and their root mass, refresh the top third of soil with new potting mix, and incorporate a slow-release fertilizer to support the incoming planting. This partial refresh, rather than complete soil replacement, maintains beneficial microorganisms while replenishing depleted nutrients.
Summer annuals like geraniums, calibrachoa, and pet-friendly plants such as marigolds carry the display through August, then yield to fall mums, ornamental kale, and pansies for late-season color. Mark your calendar for three rotation points: late April for spring-to-summer, early September for summer-to-fall, and late October for final cleanup. Containers dedicated to rotation require more hands-on attention than static plantings, but the visual payoff, fresh, seasonally appropriate displays, elevates property aesthetics throughout the entire growing year.
Essential Success Factors for Container Gardens
Container success isn’t about luck, it’s about mastering four fundamental principles that transform any vessel into a thriving mini-ecosystem.
Start with drainage. Every container needs holes, regardless of material or price point. Water must exit freely to prevent root rot, the leading cause of container plant failure. If you’re repurposing decorative pots without drainage, drill quarter-inch holes every four to six inches across the bottom, then add a one-inch layer of gravel before soil.
Soil composition makes or breaks container performance. Garden soil compacts in pots, strangling roots and blocking oxygen. Use quality potting mix formulated for containers, it contains peat moss or coir for moisture retention, perlite or vermiculite for aeration, and often starter nutrients. For vegetables and heavy feeders, blend in 20% compost for sustained nutrition.
The nutrient equation changes dramatically in containers. Unlike in-ground beds where roots mine nutrients from vast soil volumes, container plants exhaust their limited reserves within six to eight weeks. Establish a fertilization schedule: liquid feed every two weeks for annuals, monthly for perennials, using half-strength balanced fertilizer. Slow-release granules simplify maintenance for busy property managers.
Water monitoring requires daily attention during peak summer. Container soil dries exponentially faster than ground soil due to exposure on all sides. Check moisture by inserting your finger two inches deep, if dry, water thoroughly until it drains from the bottom. Self-watering systems and moisture meters remove guesswork, particularly valuable for custom landscaping installations where consistency matters.
Critical success factors:
- Adequate drainage holes prevent waterlogged roots and fungal disease
- Quality potting mix provides proper aeration and moisture balance
- Regular fertilization every two to four weeks replaces depleted nutrients
- Daily water checks during active growth ensure consistent moisture
- Container size matches mature plant root systems for sustained health
Master these fundamentals, and your containers will deliver the visual impact and growing success that makes container gardening worthwhile across Canadian growing zones.
Common Questions About Container Gardening
What container size works best for different plants?
Herbs and small annuals thrive in containers 6-8 inches deep, while tomatoes and peppers need at least 12-16 inches. Shrubs and small trees require 18-24 inch depths to accommodate established root systems and provide stability against Canadian winds.
How do I overwinter perennials in containers?
Most perennials in containers need protection since roots freeze faster than in-ground plantings. Group containers against a sheltered house wall, wrap them with burlap or bubble wrap, and mulch heavily, or move cold-hardy varieties into an unheated garage where temperatures stay between -5°C and 5°C.
When should I replace potting soil in my containers?
Replace soil annually for heavy feeders like vegetables and annuals, as nutrients deplete quickly in the confined environment. For perennials and shrubs, refresh the top third of soil each spring and do a complete replacement every 2-3 years when you notice compaction or poor drainage.
How do I manage pests in container gardens?
Containers actually simplify pest control since you can inspect plants easily and isolate affected containers. Hand-pick larger pests, use insecticidal soap for aphids, and ensure proper drainage to prevent fungus gnats, standing water in saucers is their primary breeding ground.
These questions reflect the practical challenges property managers and homeowners face once their container gardens are established. The confined growing environment creates unique maintenance requirements compared to in-ground beds, but understanding these fundamentals turns potential problems into manageable routines.
Container gardening transforms any property, from sprawling estates to compact balconies, into vibrant, productive green spaces. The ten ideas presented demonstrate that successful container gardens aren’t about available square footage; they’re about marrying creative vessel selection with scientific understanding of drainage, soil composition, and plant requirements. Whether you choose vertical tiered systems, repurposed materials, or statement urns, each container becomes both functional growing environment and design element.
Start small with 2-3 containers matched to your maintenance capacity and outdoor conditions. As you gain confidence understanding watering cycles, fertilization schedules, and seasonal transitions, expand your collection strategically. The beauty of container gardening lies in its flexibility, you can experiment, relocate, and refresh without major commitment.
JRALA combines artistic integration with scientific precision to design and install container gardens that thrive in Canadian climates. We also provide guidance for property owners who prefer hands-on maintenance while benefiting from professional design expertise. Your container gardening journey begins with a single well-chosen pot and the right plant pairing.